DaVinci Resolve - Presets For Content Creators
Thank you from Datrysiad Media for purchasing our first ever preset pack. Our aim was to create a simple pack, that allows you great flexibility at a fantastic price.
IMPORTANT
By purchasing this pack you have license to use the presets for any personal or commercial project. Re-sale of the pack is not.
Each preset has a default length of 5 seconds, they can be made longer, however they will not work correctly if you decrease the length less than 5 seconds.
All presets will display properly at any resolution.
Presets where created in a 24 fps time line but will work up to 50fps. The animation at the start and end will appear quicker the higher the FPS you set your timeline to.
Installation
STEPS
Extract the .zip file to a safe location.
Ensure you copy this to a safe location.
Operating system dependent, copy the *.SETTINGS files to the appropriate location on your hard drive
LOCATION
Windows
C:\Users\"YOUR_NAME"\AppData\Roaming\Blackmagic Design\DaVinci Resolve\Support\Fusion\Templates\Edit\Generators
Mac OS User
HD/Users/”YOUR_USER”/Library/Application Support/Blackmagic Design/DaVinci Resolve/Fusion/Templates/Edit/Generators
PRESET LOCATION
Once the files have been extracted to the correct location, you can find the presets by following these steps.
STEPS
Ensure “Effects” is highlighted, if not, select it
Expand '“Toolbox”
Select “Generators”
Click the “Search” Icon
Enter “DM”
“DM Logo” = All social media icons
”DM Icon” = All basic icons (Like, Comment, Subscribe etc)
“DM Shapes” = All basic shapes
All the presets from Datrysiad Media have the text “DM” preceding the rest of the preset title to help identify them from the list.
How to use
Basic Controls
Each preset will have similar functions that you will have control over. We have given access to the basic items that control that preset, however DaVinci Resolve will help expand this further to create richer content.
Things to know
Each preset is 5 seconds long but can be extended further.
Making the preset shorter than 5 seconds will result in the present not working correctly.
There are normally two versions of each type of preset, these simply relate to the animation that is performed, select the appropriate preset.
Some presets have multiple shapes, you will be able to change the X,Y Size and Rotation of the individual shape, giving you a new icon to use.
Triangles have the ability to become multiple shapes, they have a “Number of sides” option that you can slide to make more shapes".
Steps
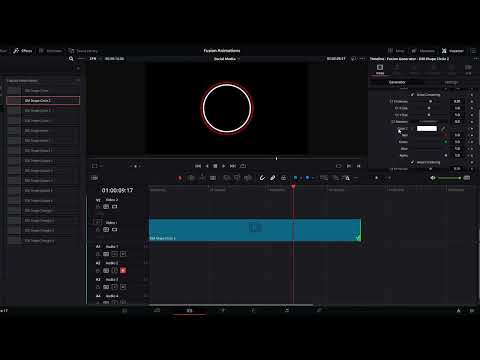
Drag your desired preset to the timeline
Move the timeline cursor to the middle of the preset
Ensure the “Inspector” is highlighted, if not, select it
Select “Generator” from the “Inspector” windowpane
Each preset will give you similar access to the following controls
Color
Line Thickness
Border Style
X, Y Size
Rotation
Icon Center
Icon Size
Icon Aspect
Icon Rotation
Flip Horizontal / Vertical Axis
How to use
Animation
Each preset can be animated between states. This works on the principle of key frames, setting a key frame at one point, moving to the next and setting another desired key frame.
THINGS TO KNOW
It is important that you set the length of the preset first before setting any key frames.
Key frames are start and stop points on the preset, whilst you can move the preset and the animation will persist, changing the length of the preset wont stretch that animation out, it will stay at the points the key frames where set.
STEPS
The following example will show how you can use key frames to change from one colour to another. This method applies to all the controls within the preset.
Drag your desired preset to the timeline
Either leave the present at the default 5 seconds or extend it further
Move the timeline cursor to the start of the preset
On the right-hand side for each control is a diamond, when no key frame is set it will be grey, click this diamond to set a key frame for the colour currently selected.
Move the timeline cursor further along the preset around 3/4 of the way
Click the (Colour / Colour 1) box
A color dialog box will appear allowing you to set another colour, pick on of your brand colours and click “OK”
You will notice a new key frame has appeared, turning the diamond red.
Slowly move the timeline cursor back towards to start of the preset, you will notice the colour will transition to the colour that was set at the first key frame.


