
Intro
Today we are looking at timecode, the main reason for looking into this is because of the workflow benefits this can have for post editing when it comes to syncing multiple cameras and audio gear!
I was shooting a wedding and one of difficulties I had in post was ensuring all cameras and audio where in sync. The reason for this is that each camera was quite far apart, more so than a normal interview set up. This meant I had to rely on a visual que during the ceremony to make this work.
This begs the question, if there was no clear visual que between all cameras during that ceremony, then what do we do?
Expensive cost of entry
The downside of timecode is the cost of entry, which can be quite an expensive investment upfront. For instance, for every camera / audio gear you own that does not have timecode built in then you will need to purchase a third-party device which can supply this.
Most devices like the Tentacle Sync cost around £330, this means for just the three cameras we are looking at close to 1K. This does not take into account for audio, so we can see that this investment can be quite step.
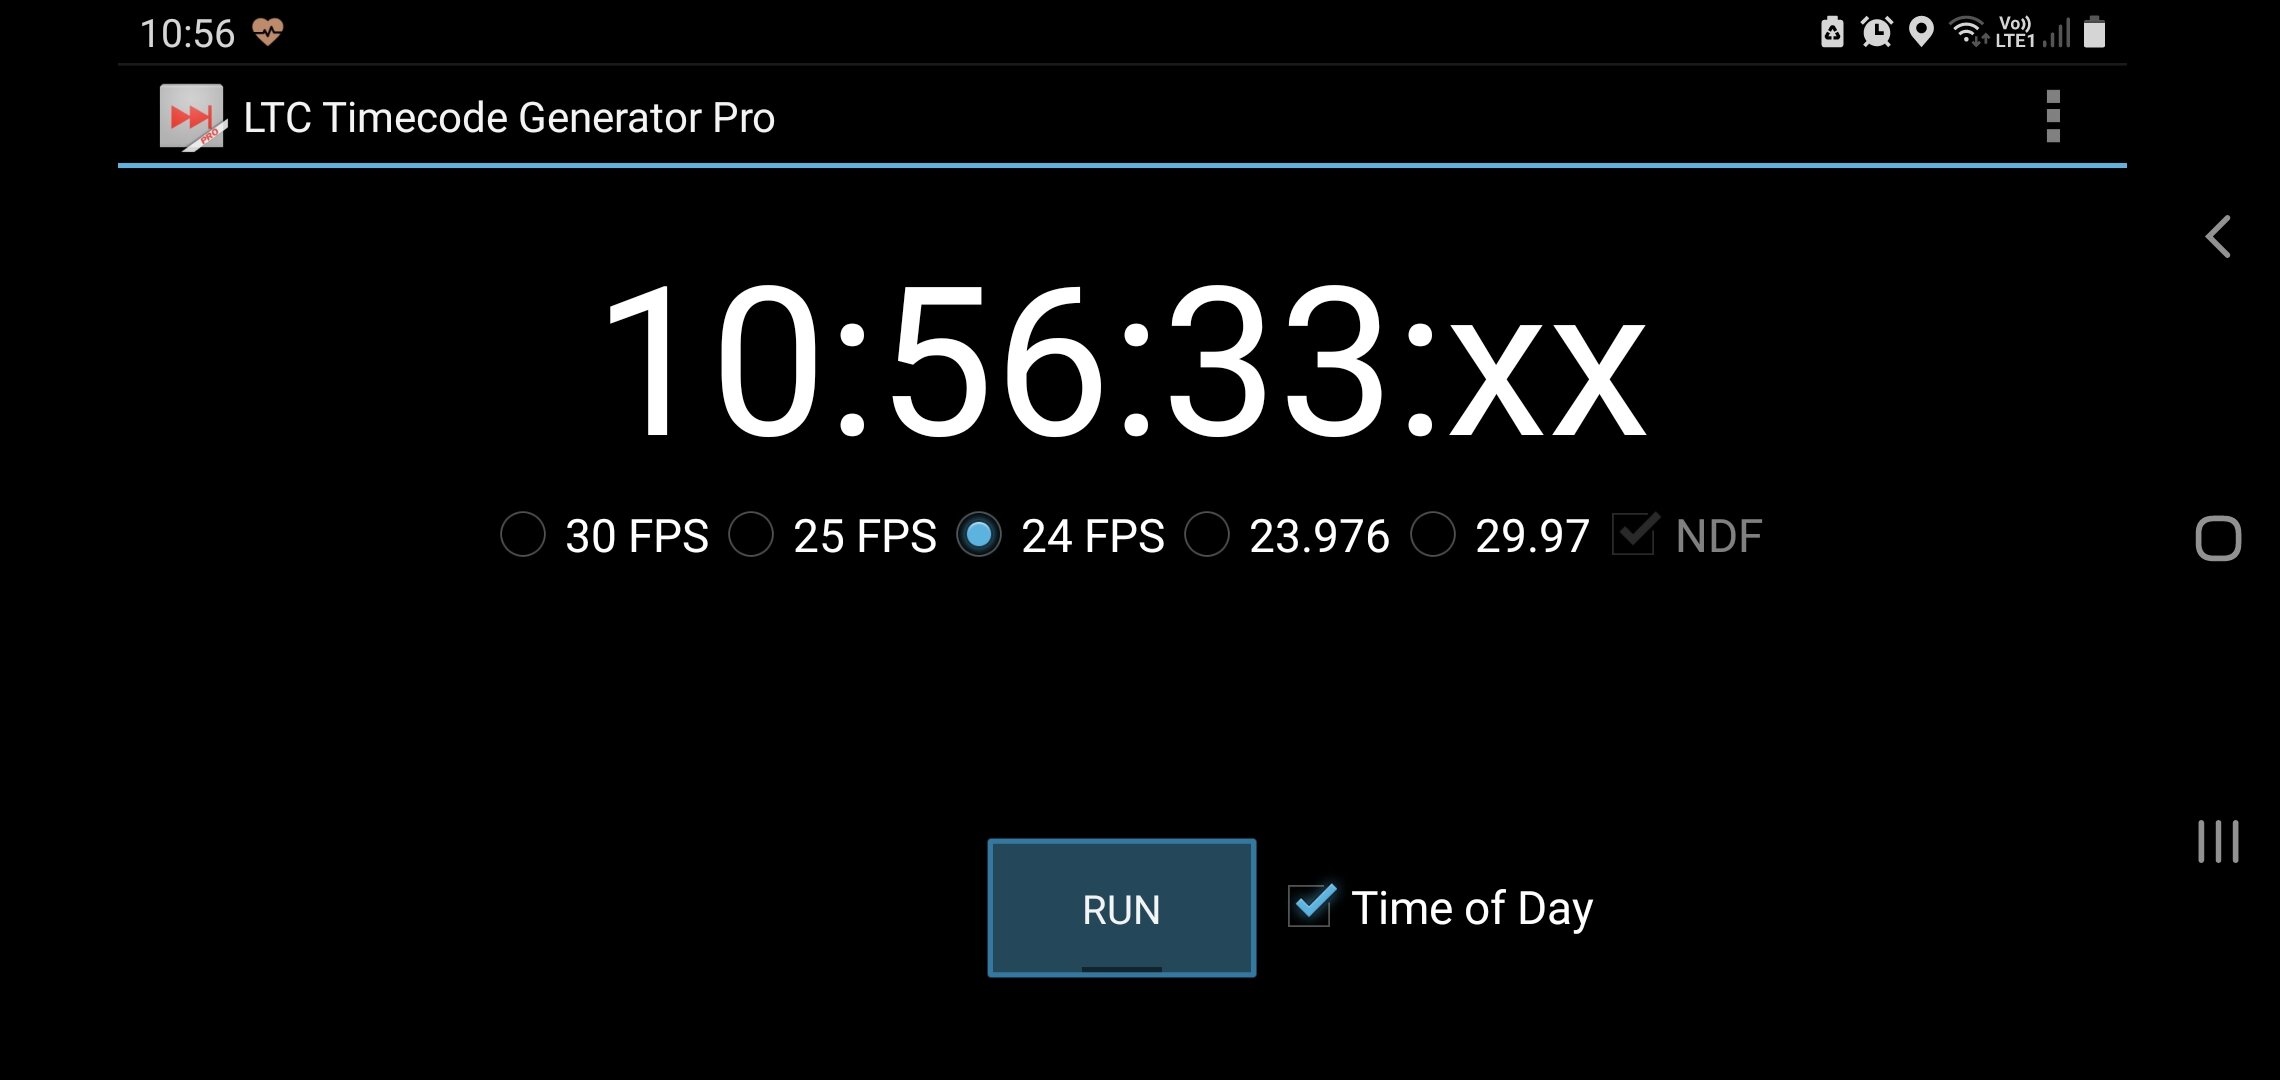
An affordable alternative?
You can download a free timecode generator app for your phone. Right now, I use an android device and the app in question is “LTC Timecode Generator”, now I have the free version and the paid, which cost around £10.00, considering the cost of timecode hardware it seemed cheaper way to assess if timecode workflow was all it cracked up to be.
How it works
The way in which we will make this work for us is to use the timecode app as a visual marker which will be recorded by each camera we are using during the shoot. The timecode will be running at 24fps and so will our camera’s.
If you have cameras that shoot at 23.976 then you will have to convert these files to 24. This is something I already do and is part of my workflow, so this is a non-issue for me, however it maybe another step you must take as part of your business.
The reason for this is that the cameras will record in H.264, which is great for file size but a nightmare for efficient editing and rendering. Therefore, I convert the footage from H.264 to DNxHR. The audio equipment I use I have set to a sample rate of 48Khz, so this fits nicely in the 24fps timeline in the video editor software, which also means it will match when we sync this up in post.
What to do
Start the audio recording on your lavaliere microphones and other audio recording devices
Start the recording on all your cameras you plan to use
Face the first camera with the timecode app, make sure the phone sound is on. Run the time code app whilst it is facing the first camera, hold it in place for a few seconds.
Leave the timecode app running, then move to the second camera and hold it in view for a few seconds.
Repeat this process until all cameras have time code recorded.
You will have to do this each time you press record on the cameras.


In Post
Davinci Resolve allows you to select a frame and enter the timecode for that frame. Because we have recorded a portion of timecode, we know what this should be for that frame. Once entered, Davinci Resolve can extrapolate when the start time and end time of the clip is because we have a set reference point.
For cameras that split their files, then the second and third clips won’t have time code. Look at the last entry for timecode on the first clip and use that timecode + 1 frame for the start of the next clip. This will set the timecode for the second clip. Repeat this process until all clips for that camera is set.
Make sure in the meta data for each clip that you label which camera it is associated with. For me I label my main camera as 1, the second camera as 2 and so on.
Matching audio to the main camera
Go the main camera, so this should be camera 1. In that video move to the frame where you first hear the timecode noise. Then move back 1 frame, copy the timecode number so we can use this in the audio file.
In the main audio file that you will use, move to the frame where you first hear the timecode noise. Move back 1 frame, paste the timecode taken from camera 1. How you do this will be different for each video editing software. For Davinci Resolve, we right click the file, select clip attributes, then timecode.
If the audio files are split, in the same manner we added timecode for the cameras, you will do the same for the audio files, once the first audio file has timecode.
Once the files have received timecode, then we can sync this with the main camera based on timecode.
Multi camera setup
The hard work is done since all the files we recorded now have timecode. This will allow you to create a multi cam setup in your editing software based on timecode and the camera angle. Multi cam setup is different discussion, but this should get you closer to an easier workflow.
Conclusion
Trying this method will allow you to review if timecode is something you should really invest in. For me it is a big yes, but not before the business is there to invest in it. For the time being I will use this affordable method for timecode.
There are some drawbacks, using this method will mean that each time you stop the cameras you are required to re-apply the process of recording the timecode. However, because we are doing this for free, manual intervention is going to be the cost here.
Timecode which is device driven means that once the master clock is running and the devices are synced then we can stop and stop recording on the cameras and audio gear without issue as timecode is always running and always present when you record.
I love working with timecode and the benefits it will bring will greatly improve my workflow performance, meaning better value being provided to my clients. That in itself is something worth pursuing.